
移行スクリプトの準備
Wordpress から Sanity にコンテンツを移行するための受け皿の準備が完了したので、サンプルとして提供されているマイグレーションのスクリプトを利用していきます。
ここでの手順に関する公式のページは以下のとおりです。
スクリプトの準備
Wordpress から Sanity に移行するためのスクリプトのベースのものが用意されており、基本的にはこのベースのスクリプトを利用すれば普通に移行することが可能です。スクリプトは以下のコマンドを実行すると、コピーされます。
npx sanity@latest migration create "Import WP"コマンドを実行すると質問が表示されます。
- Option に関しては今回は特に指定しないで Enter
- Minimalistic migration to get you started を選択して実行
コマンドの実行が完了すると、migrations/import-wp/index.ts のファイルが作成されます。

ツールを実行するにあたって、環境で必要となるコンポーネントをインストールします。コマンドは以下のとおりです。
npm install -D wp-types html-entities p-limit @portabletext/block-tools @wordpress/block-serialization-default-parser jsdom続いてマイグレーションスクリプトが利用するスキーマに関して定義するファイルとして、migrations/import-wp/types.ts のファイルを用意します。
import type {
  WP_REST_API_Categories,
  WP_REST_API_Pages,
  WP_REST_API_Posts,
  WP_REST_API_Tags,
  WP_REST_API_Users,
} from 'wp-types'

export type WordPressDataType = 'categories' | 'posts' | 'pages' | 'tags' | 'users'

export type WordPressDataTypeResponses = {
  categories: WP_REST_API_Categories
  posts: WP_REST_API_Posts
  pages: WP_REST_API_Pages
  tags: WP_REST_API_Tags
  users: WP_REST_API_Users
}

export type SanitySchemaType = 'category' | 'post' | 'page' | 'tag' | 'author'
移行元となるサイトの情報を定義するファイルを ./migrations/import-wp/constants.tsconstants.ts として作成します。URL の部分は以前の記事でも取得方法を記載していますので参考にしてください。
今回は以下のようになります。
// Replace this with your WordPress site's WP-JSON REST API URL
export const BASE_URL = `https://public-api.wordpress.com/wp/v2/sites/haramizujp.wordpress.com`
export const PER_PAGE = 100
最後に、./migrations/import-wp/lib/wpDataTypeFetch.ts のファイルを作成して準備が完了となります。
import {BASE_URL, PER_PAGE} from '../constants'
import type {WordPressDataType, WordPressDataTypeResponses} from '../types'

export async function wpDataTypeFetch<T extends WordPressDataType>(
  type: T,
  page: number
): Promise<WordPressDataTypeResponses[T]> {
  const wpApiUrl = new URL(`${BASE_URL}/${type}`)
  wpApiUrl.searchParams.set('page', page.toString())
  wpApiUrl.searchParams.set('per_page', PER_PAGE.toString())

  return fetch(wpApiUrl).then((res) => (res.ok ? res.json() : null))
}
完了した時の migrations にあるフォルダのファイルの構成は以下のようになっています。
- migrations
  - import-wp
    - lib
      - wpDataTypeFetch.ts
    - constants.ts
    - index.ts
    - types.ts
スクリプトのアップデート
上記で用意したスクリプトを実際に動作っせるために、./migrations/import-wp/index.ts のファイルを更新します。更新結果は以下のとおりです。
import type {SanityDocumentLike} from 'sanity'
import {createOrReplace, defineMigration} from 'sanity/migrate'

import {wpDataTypeFetch} from './lib/wpDataTypeFetch'

// This will import `post` documents into Sanity from the WordPress API
export default defineMigration({
  title: 'Import WP',

  async *migrate() {
    const wpType = 'posts'
    let page = 1
    let hasMore = true

    while (hasMore) {
      try {
        const wpData = await wpDataTypeFetch(wpType, page)

        if (Array.isArray(wpData) && wpData.length) {
          const docs: SanityDocumentLike[] = []

          for (const wpDoc of wpData) {
            const doc: SanityDocumentLike = {
              _id: `post-${wpDoc.id}`,
              _type: 'post',
              title: wpDoc.title?.rendered.trim(),
            }

            docs.push(doc)
          }

          yield docs.map((doc) => createOrReplace(doc))
          page++
        } else {
          hasMore = false
        }
      } catch (error) {
        console.error(`Error fetching data for page ${page}:`, error)
        // Stop the loop in case of an error
        hasMore = false
      }
    }
  },
})
主な変更点は、以下のとおりです。
- wpDataTypeFetch.ts を読み込んで追加したファイルを有効にしています
- wpDataTypeFetch.ts は constants.ts も読み込んでいます
これで準備が完了です。
スクリプトを実行する
これで準備が完了したため、スクリプトを実行してデータの移行の最初のステップに入ります。
npx sanity@latest migration run import-wp実行すると、ブログの投稿が取得できるかのテストが走ります。
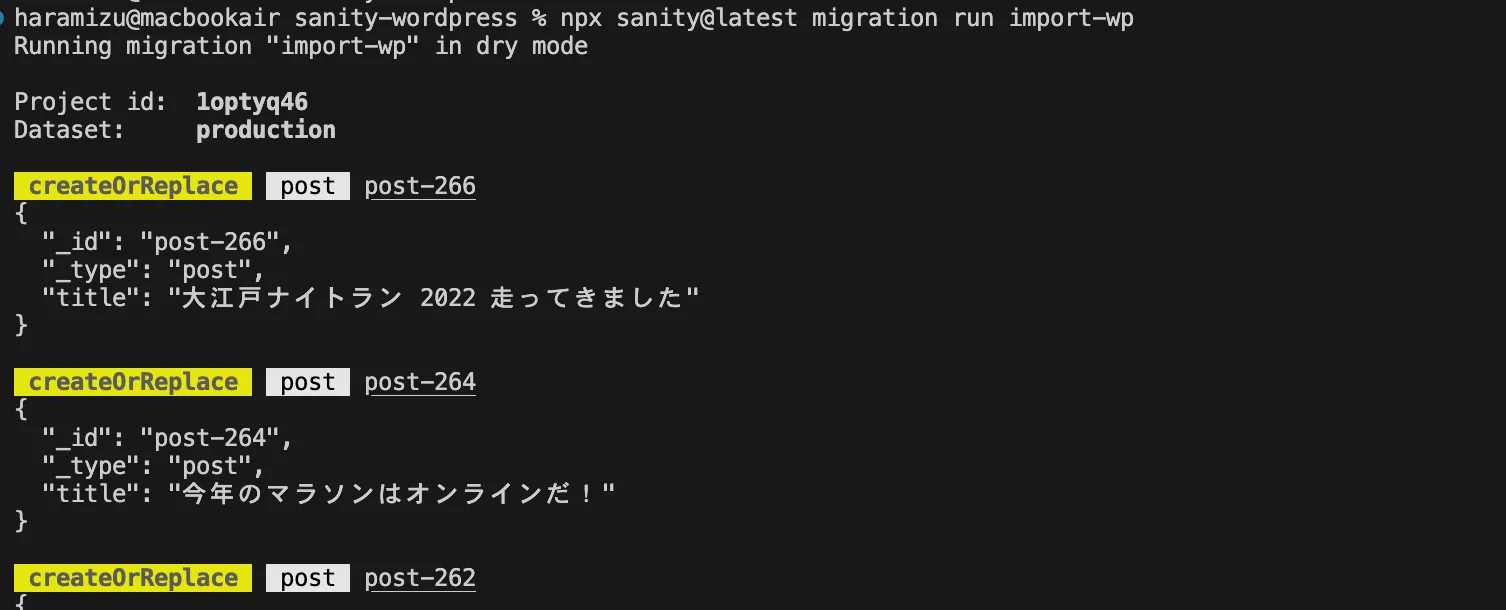
問題なく取得できているので、以下のコマンドを実行して、データのインポートを実行します。
npx sanity@latest migration run import-wp --no-dry-run実行をすると、以下のようにデータのインポートを実行するかの確認が表示されるため、ここでは Y で実行を続けます。

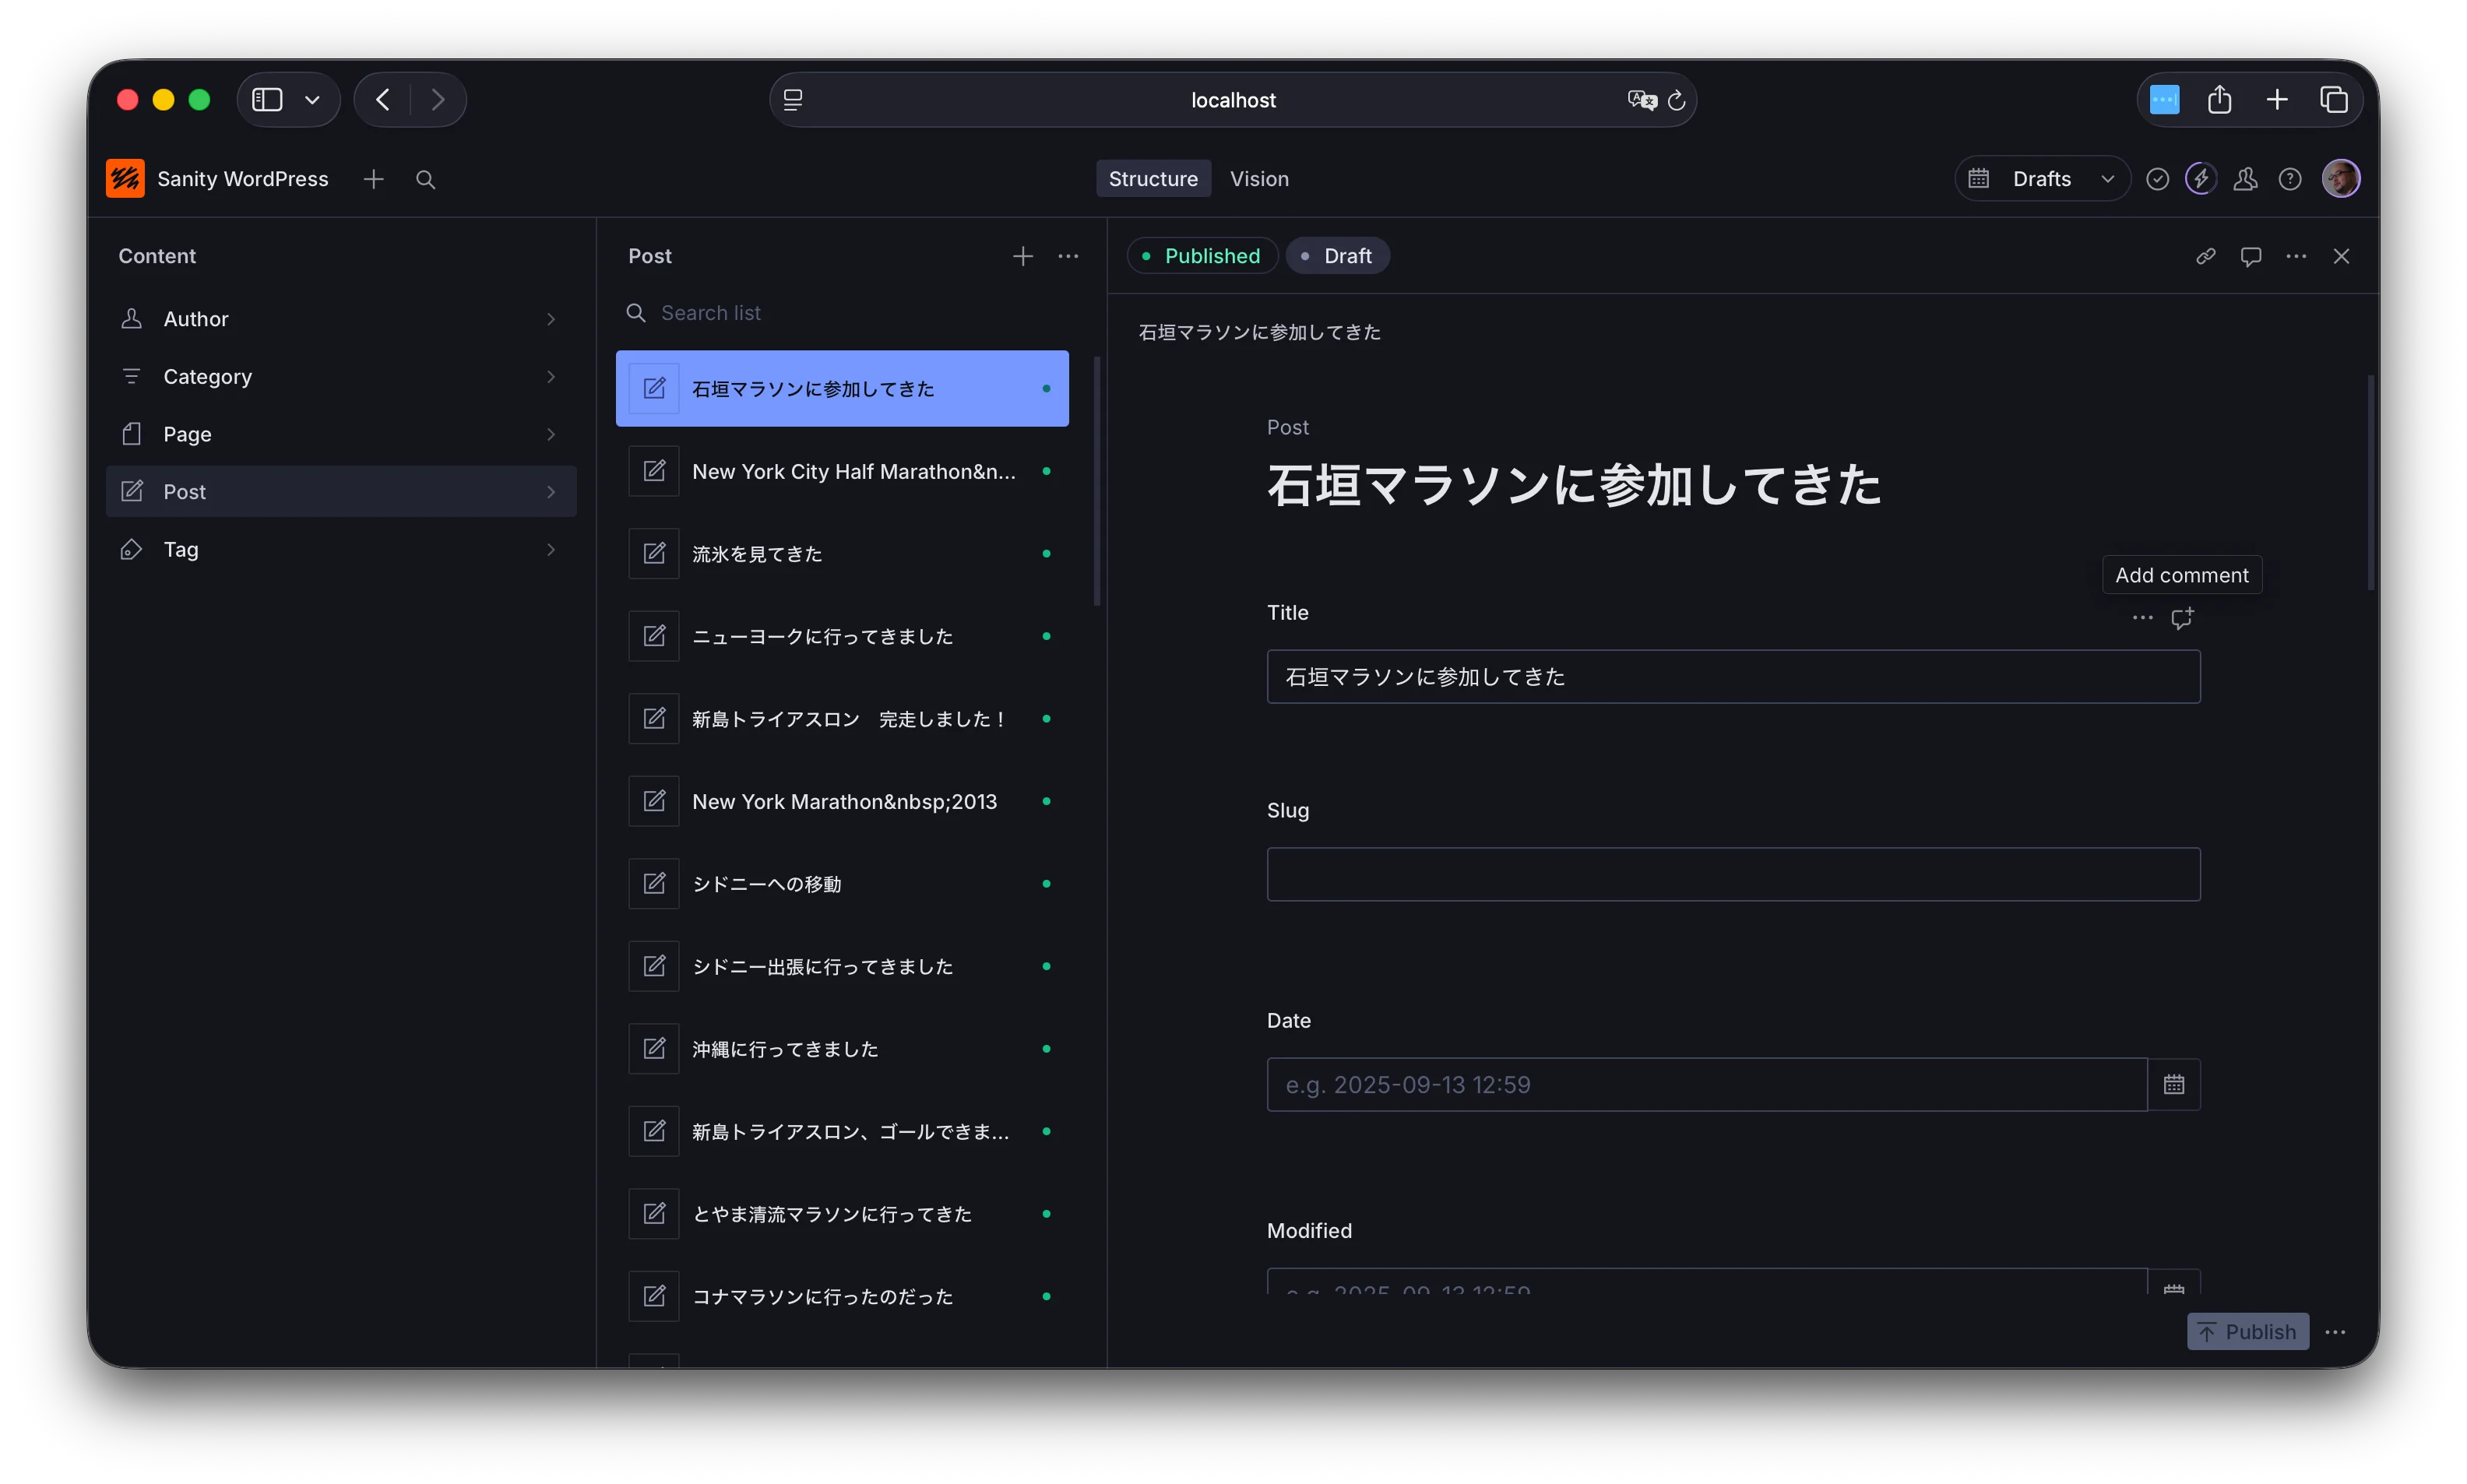
スクリプトの実行が終わると、データの移行が完了します。Sanity Studio を起動します。
npm run devコンテンツのタイトルのインポートが完了しました。
まとめ
手順に沿って Wordpress のコンテンツと連携できるスクリプトを設定して、Wordpress のコンテンツのタイトルを利用して Sanity にコンテンツを移行することができました。ここまでのコードは以下のブランチで公開しています。
タイトルのみの移行ができたところで、次のステップに進めていきます。